Draw a Rose Step by Step Easy
When talking about flowers, the rose is undoubtedly the symbol of love. Roses are aesthetically pleasing to look at, but like any other flower, they wither over time.
Why not learn how to draw a rose instead? With a rose drawing, you can appreciate its beauty up close and personal endlessly.
Fortunately, we have created a step-by-step tutorial on how to draw a rose, summed up in 9 quick and easy steps.
Each instruction comes with an illustration to serve as your visual guide as you follow the steps one by one.
With the help of this guide, you can surely draw a rose whether you're a beginner or an expert in drawing!
Have fun and use your artistic skills to draw a beautiful rose!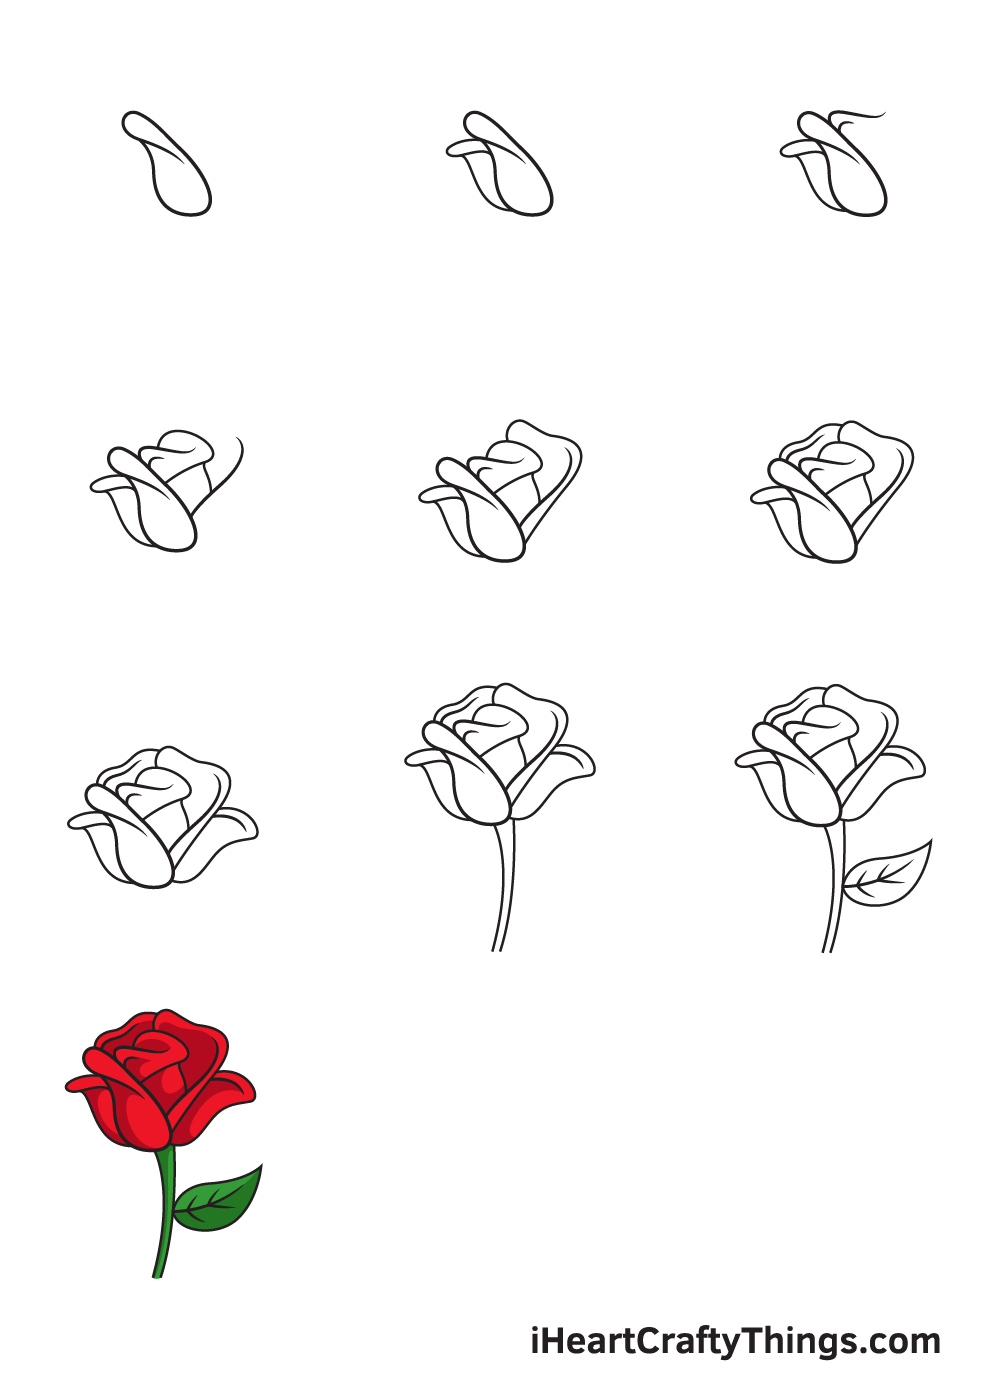
What's in this Blog Post
- How to Draw a Rose – Let's get started!
- Step 1
- Step 2 – Draw the First Two Petals of the Rose
- Step 3 – Next, Draw the Petal on the Back Part
- Step 4 – Now, Draw the Middle Part of the Rose
- Step 5 – Then, Add More Petals on the Right Side
- Step 6 – Add More Rose Petals on the Back Part
- Step 7 – Complete All the Petals of the Rose
- Step 8 – Afterwards, Draw the Stem of the Rose
- Step 9 – Now, Draw a Leaf on the Right Side
- 3 More tips to make your rose drawing easy!
- Your Rose Drawing is Complete!
How to Draw a Rose – Let's get started!
Step 1
Start by drawing an irregular figure that comprises curved lines on the upper left portion of your paper.
This forms the leftmost and the biggest visible petal of the rose.
Step 2 – Draw the First Two Petals of the Rose
Now, we will simply replicate what we did in the previous step. This time, create a smaller petal figure behind the first petal we drew previously.
Don't worry if the petals don't look identical! The petals don't necessarily have to be uniform. As a matter of fact, the more uneven the petals are, the more realistic they look!
Step 3 – Next, Draw the Petal on the Back Part
This time, we will be drawing the section of the inner petal.
Draw curved figures to represent this, as shown in the illustration.
Step 4 – Now, Draw the Middle Part of the Rose
This step is like the combination of the previous steps because we will be drawing parts of the inner petals and outer petals.
Draw curved lines to complete the inner petal and part of the outer petal.
Step 5 – Then, Add More Petals on the Right Side
This time, we will be finalizing the section of the huge outer petal.
Draw curved lines to represent this, just like the one shown in the illustration.
Step 6 – Add More Rose Petals on the Back Part
To complete the "wraparound" look of the petal, we will be drawing another petal. But since this petal is located at the back, only its top part would be visible.
To create this petal, simply draw a curved line forming the top edges of the petal.
Step 7 – Complete All the Petals of the Rose
Create the last petal by drawing another curved figure on the rightmost side of the rose.
Since this petal is located on the outer part of the rose, this should be more bended and curved compared to the other petals.
Step 8 – Afterwards, Draw the Stem of the Rose
Now, we can see that the rose is gradually coming together!
In this step, we will be adding the stem of the rose. Simply draw two parallel curved lines right underneath the rose.
Step 9 – Now, Draw a Leaf on the Right Side
In this step, we will be adding a single leaf on the right side of the stem of the rose.
Create the leaf by drawing an irregular shape with a round edge on the left side and a pointed end on the opposite side. This forms the shape of a single leaf.
Afterwards, draw a slightly curved line across the length of the leaf. This creates the middle line of the pattern on the leaf.
Then, draw multiple diagonal lines connected to the middle line to finalize the distinct patterns inside the leaf.
There you have it—you have successfully drawn a rose! Now, it's finally time to put some color on your beautiful rose!
As you can see in the illustration above, we used the color red for the petals and green for the stem and the leaves—a classic color combination for a rose!
Rose flowers exist in a wide range of colors, including red, pink, white, purple, yellow, orange, and many more! You can opt to color the rose using its original colors or use an entirely different color. Either way, we're sure the colors will turn out beautifully!
How you will color the rose is entirely up to you! Have fun playing with colors and watch as the rose ultimately comes to life!
3 More tips to make your rose drawing easy!
Make your drawing of this beloved flower even easier with these fun and easy tips!
Roses are known for their complex petal structure, and this can make creating this rose drawing a lot harder.
We tried to simplify this in the guide, but you could simplify it even more if you are still struggling.
If you wanted to try this, you could make the rose look more cartoonish or maybe just more stylized.
Simplifying a design even a little bit can make it much easier, so don't be shy about making it as simple as you need.
Do you have a style in mind that you could use when changing this design?
Leading on from the previous tip, you can also change the form and the angle for this drawing of a rose. For instance, the details on a rose are a lot less complex when the flower is closed up.
You can find many pictures of roses in this form to help you out if you want to make your rose look like this. Another option would be to draw the rose from a top view.
This might help you get around some of the trickier petal details, and you can again find plenty of pictures to help out. In fact, using pictures of real roses is generally a great idea!
If you can get a real rose to use as a model then that's even better, as you can look at it at any angle you please.
Finally, if you're having a hard time creating this rose sketch but still want it as a part of this picture, you can add other elements. One great idea would be to add some more flowers that you love.
If you were to do this, then you'll want to pick flowers that are a bit less complex and easier to draw. Then, you could use these flowers in the foreground to cover any parts of the rose you're struggling with.
For an added benefit, you will also have a beautiful bouquet to show off!
Your Rose Drawing is Complete!
Hopefully, you had a fun drawing activity with this step-by-step rose drawing tutorial.
If you enjoyed drawing a rose, then you might also be interested in drawing a daisy or other kinds of flowers! Which flower would you like to draw next time?
Remember, all of our drawing tutorials are 100% free for you to use as references and materials for your drawing activities.
We are regularly updating our "How to Draw" catalog, so don't forget to keep checking back to continuously enjoy brand-new drawing tutorials!
Now that you've successfully drawn a rose, you should feel proud of yourself for finishing a masterpiece!
Make sure to take a photo of your artwork and share it on our Facebook page and on Pinterest. Don't be shy—we're sure it looks awesome!
We're excited to see your stunning rose drawing.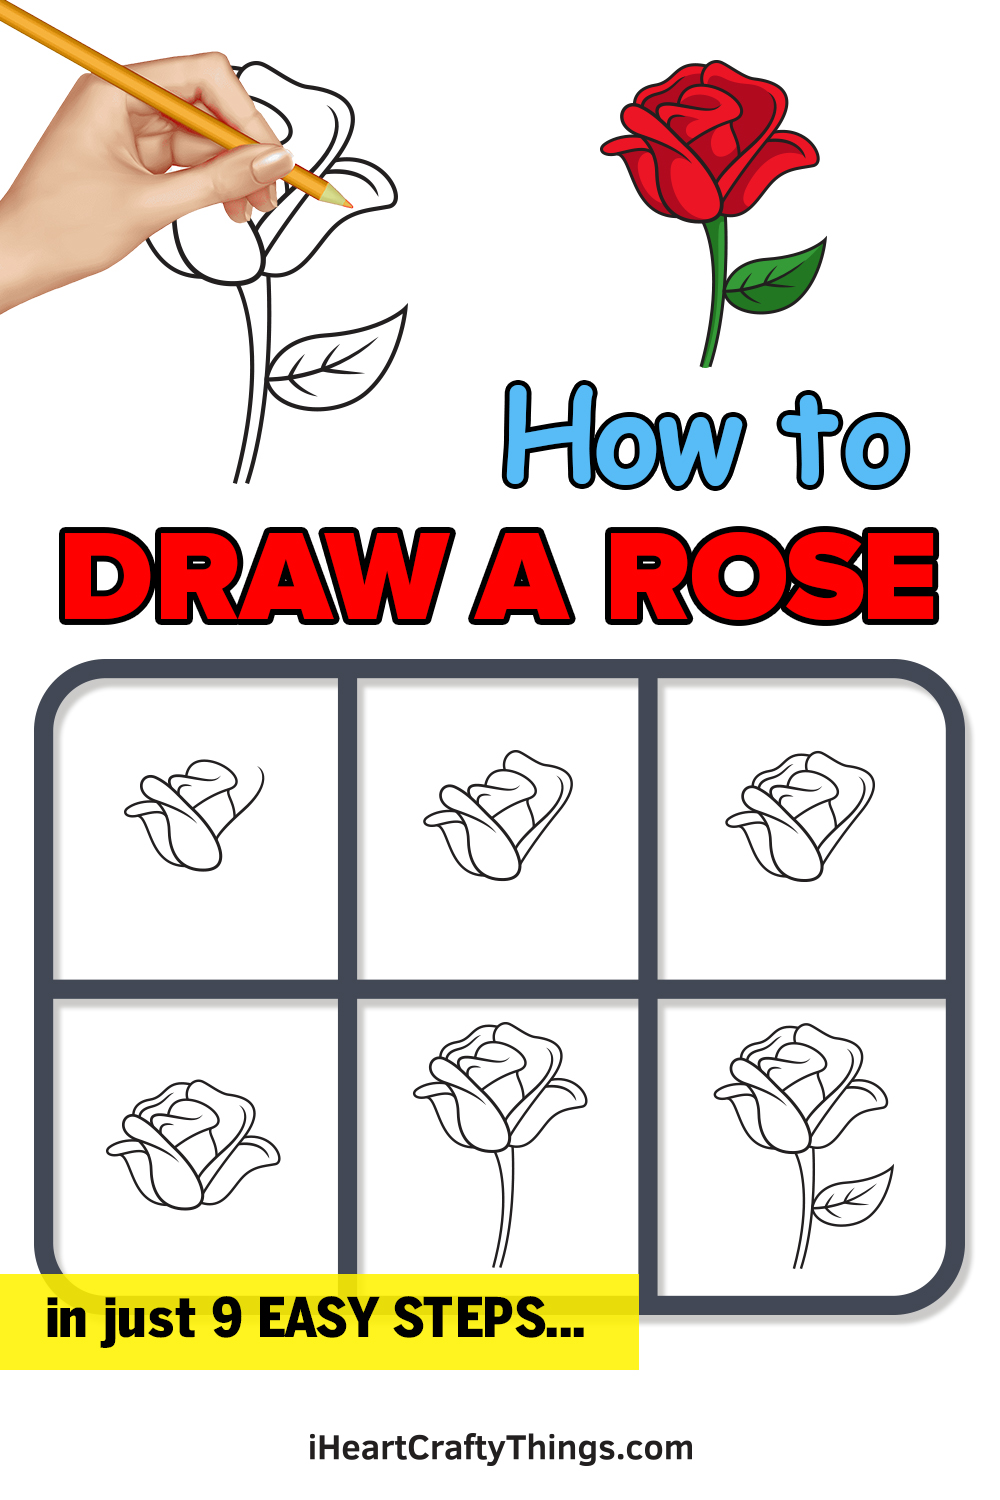
Source: https://iheartcraftythings.com/rose-drawing.html
Belum ada Komentar untuk "Draw a Rose Step by Step Easy"
Posting Komentar