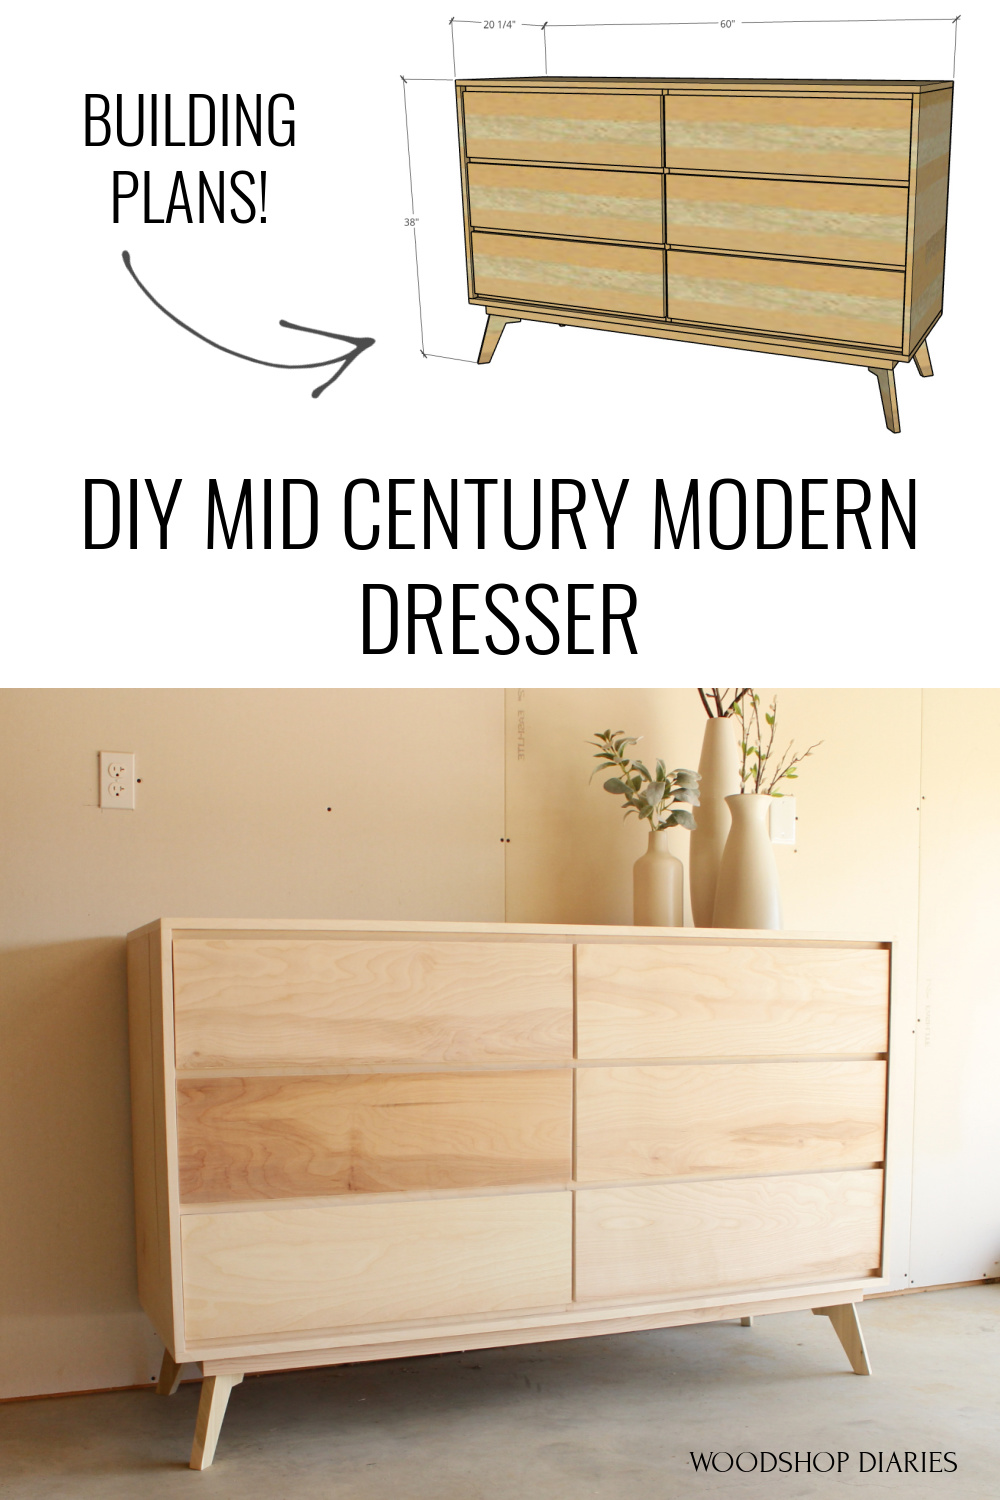
Plans for Mid Centery Six Drawer Dresser
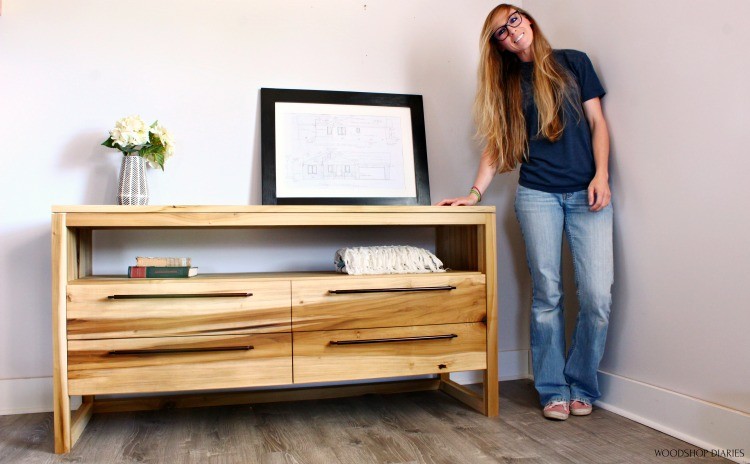
In this post, I'll show y'all how to build a modern dresser with a mid-century manner!
Dressers are literally my favorite thing to build. There are so many ways to build a box and add drawers so many styles yous can go with for it.
.
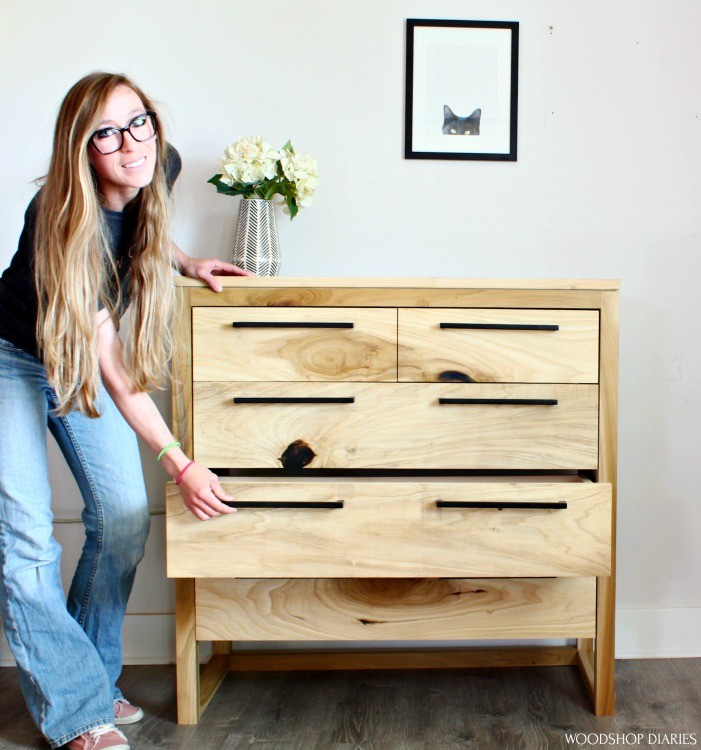
But mid-century modern fashion has my middle! And then, clearly, when a friend asked me to build a DIY mid-century modernistic dresser, that was a projection I could get excited near!
.
If mid century design isn't your favorite, though, I have plenty more dresser plans to choose from here:
-
Elementary DIY Dresser -
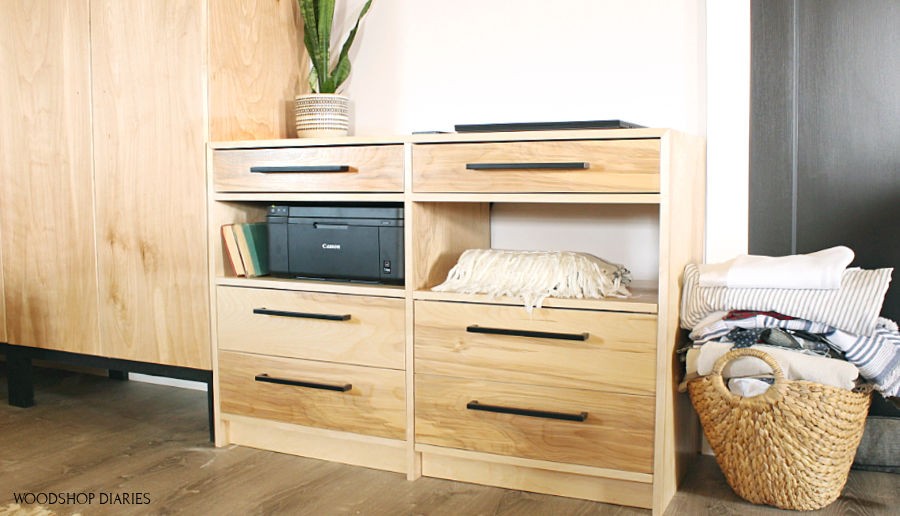
DIY Dresser Desk -
DIY Modern Dresser -
DIY 5 Drawer Dresser -
DIY 4 Drawer Dresser
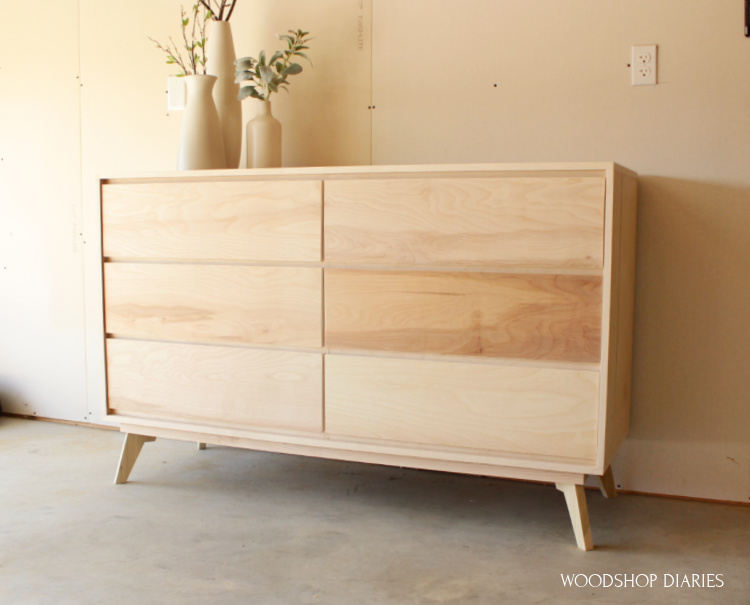
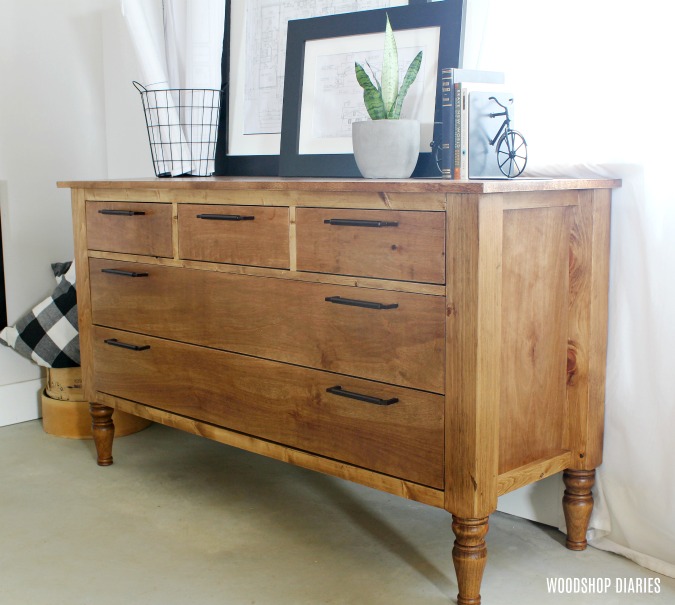
Now in case you're wondering why this particular mid century modern dresser isn't finished, the friend I made this for wanted to stain it herself.
.
So I'm going to show you the build process, but for finish, you lot'll have to use your imagination haha.
.
I've got the printable plans, and details beneath, likewise every bit a video right here:
This post contains affiliate links. See policies.
For this DIY Mod Dresser, You Will Need:
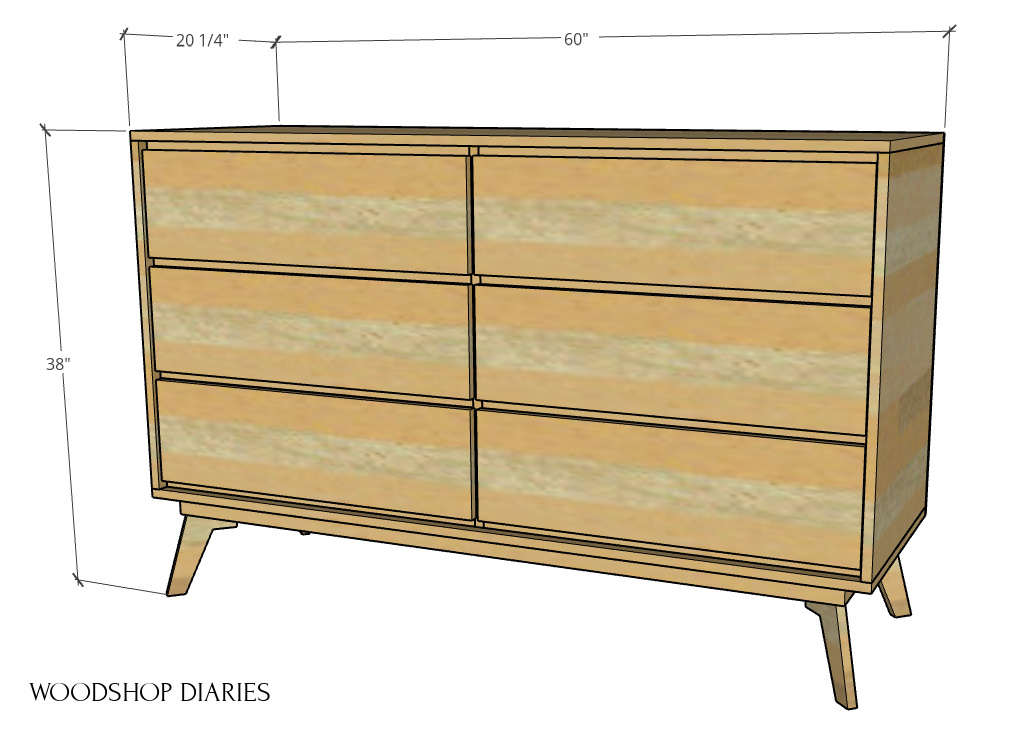
Overall Dimensions:
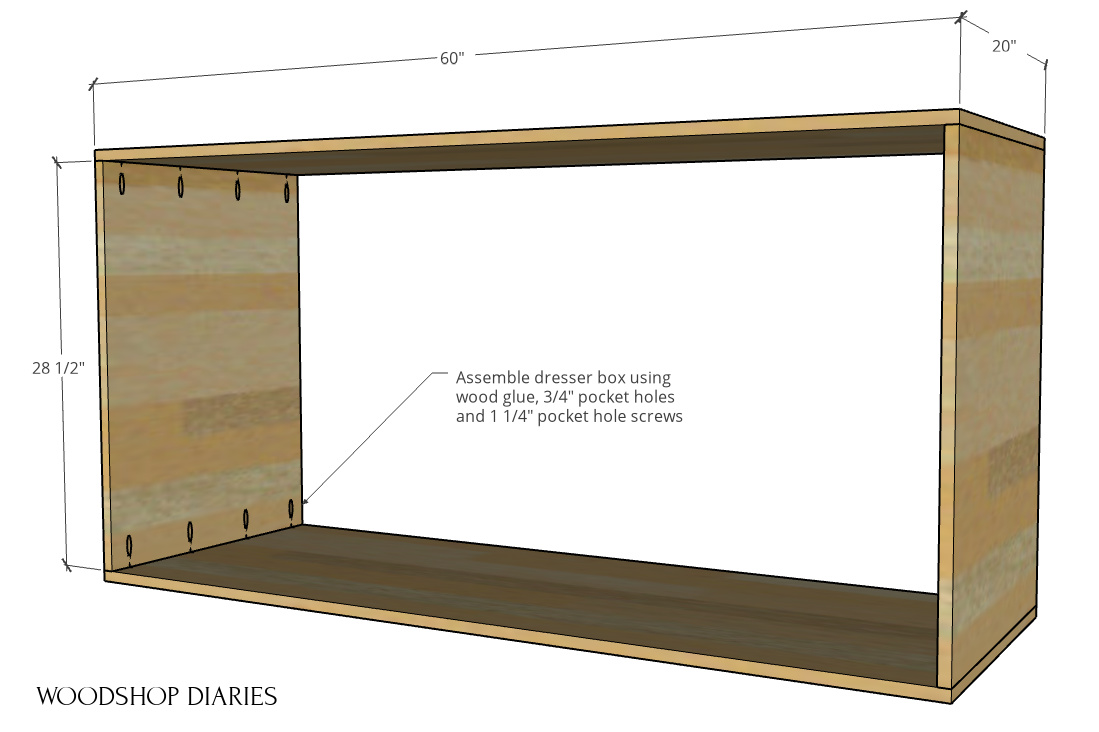
Step one: Cut Plywood and Assemble Main Dresser Box
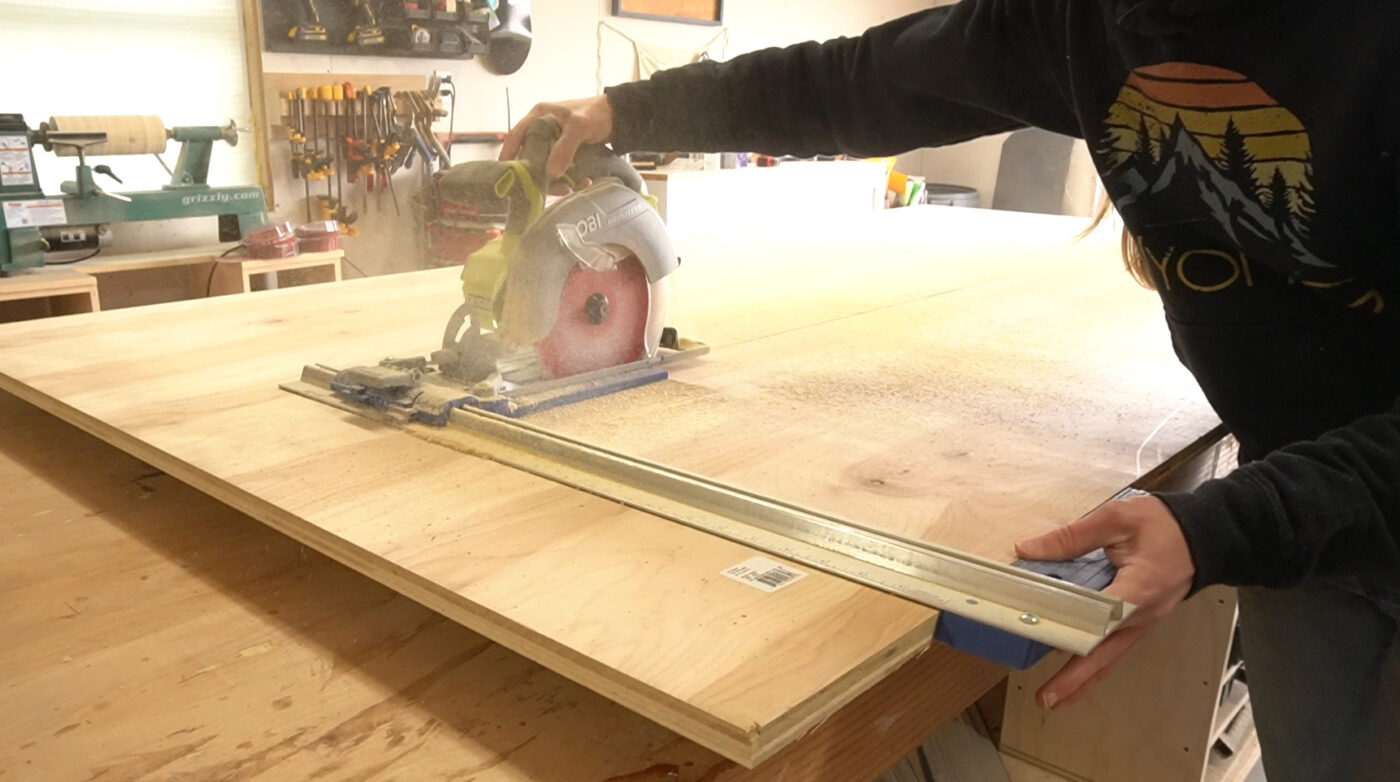
I built the chief body of this dresser and all the drawers using ¾" birch plywood.
.
This project calls for using 3 sheets, but if you have some scraps, you can probably go away with using two total sheets and some scraps to make the last couple drawer fronts.
.
Although I tried to utilise as much of my scraps as possible, I yet had to cut down some larger sheets and for this, I used my circular saw and cutting guides.
RELATED: Check out how to easily cut downwards plywood sheets in this post.
One time I had a top, bottom and two side panels cut for the dresser body, I applied some iron on edge banding to all the sides of the plywood that will be exposed.
RELATED: How to employ fe on edge banding to cover plywood edges.
.
Once the banding was applied and the pieces were sanded, I used ¾″ pocket holes and 1 ¼″ pocket hole screws to assemble the principal body like shown here.
RELATED: Cheque out this mail most how to use a pocket hole jig.
.
I used wood glue on all these joints WITH the screws for a more rigid hold.
Step 2: Install Middle Dresser Divider Panel
Once the glue was dry on the main torso, I cut and installed a centre divider panel. I cut this then that it was 1" narrower than the master dresser body so that I could install it one" inset from the front edge.
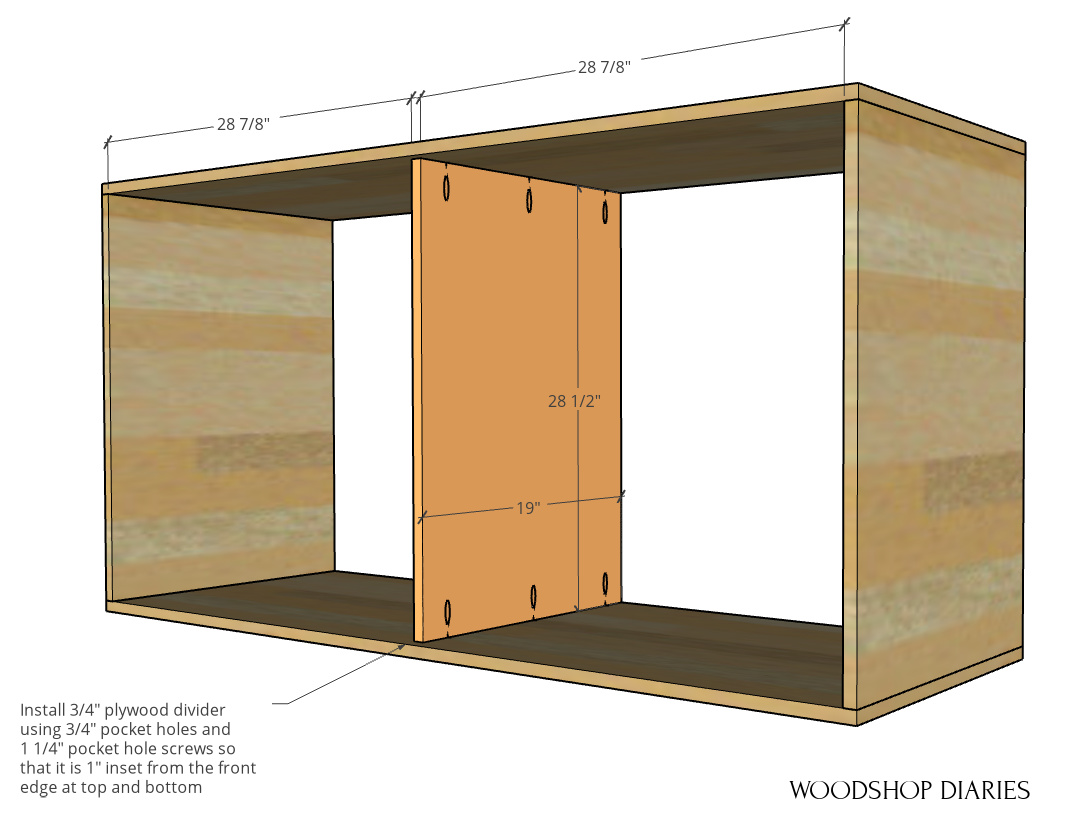
I simply used pocket holes and screws once again here and double checked pretty often that it was centered in the box.
Step three: Install Modern Dresser Drawer Dividers
I used scrap plywood for this, but you could also use 1x3s or a like size board. They don't accept to be an verbal width as they're mainly just for looks.
.
I found some thin strips in my plywood scrap pile and cut them down to fit between the dresser sides and the divider panel.
.
After applying edge banding to the front edges, I glued and nailed two at the height and two at the bottom keeping them i" inset from the front end edge.
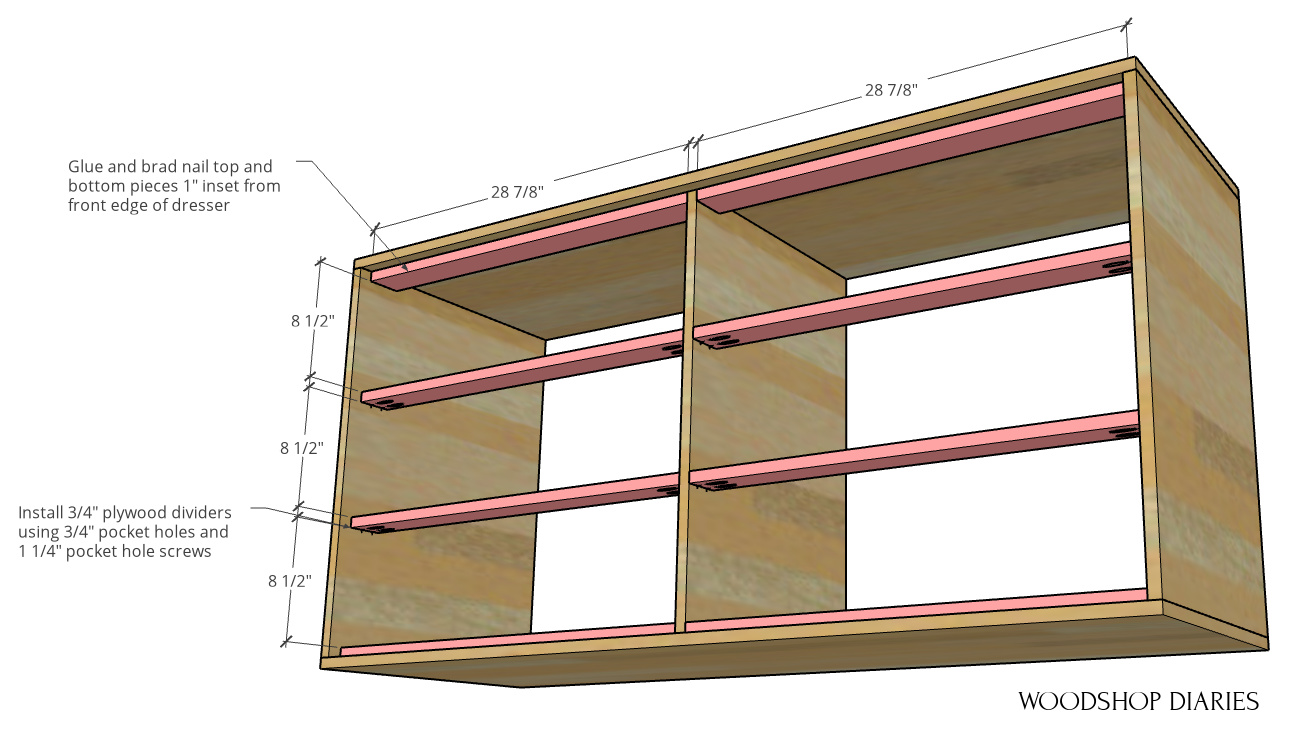
Then, I drilled pocket holes to adhere the 4 in the centre. These needed to be eight ½" autonomously, so I cut a spacer block to help keep them in place while I collection the screws. Again, these were 1" inset from the front edge too.
.
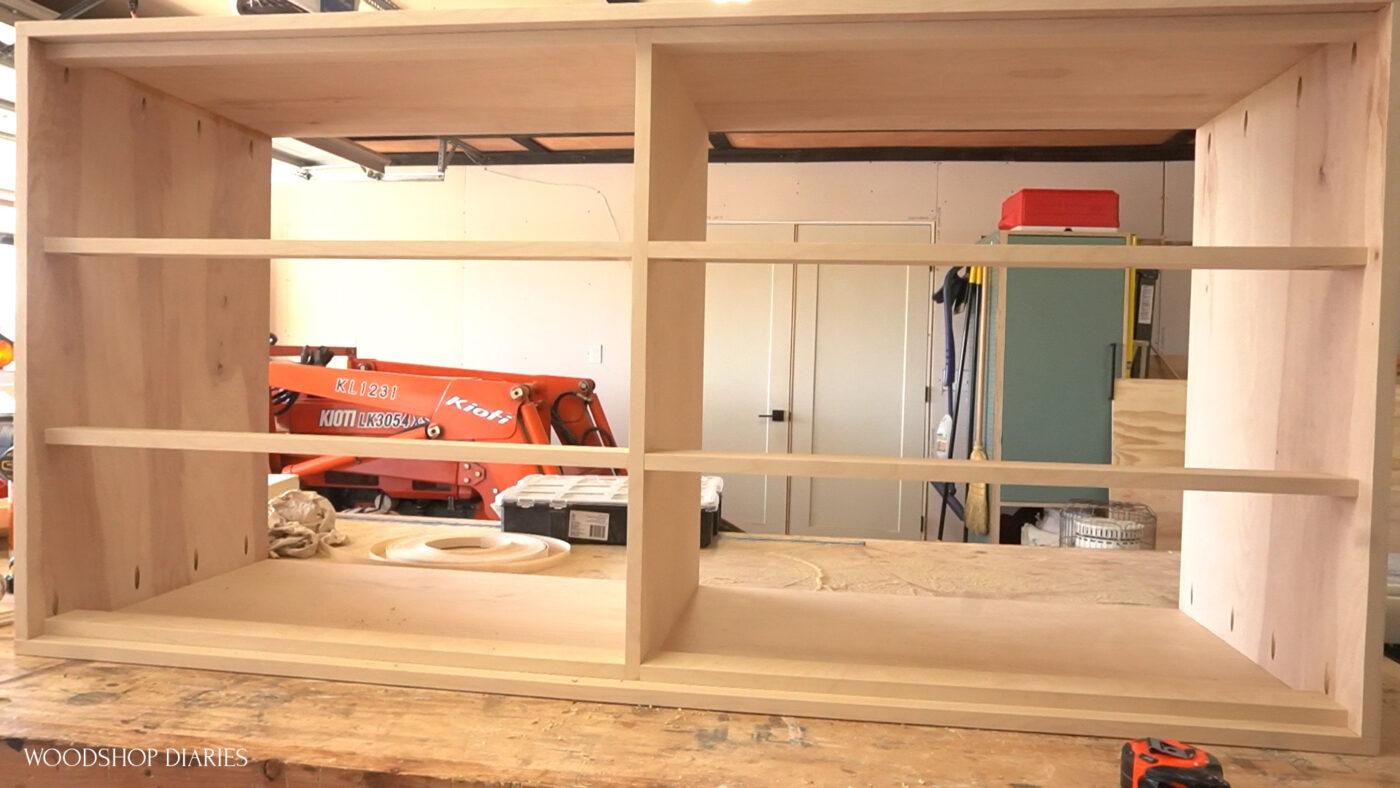
That completed the main frame of the dresser, so now it was time to move onto my favorite part of every build—the drawers.
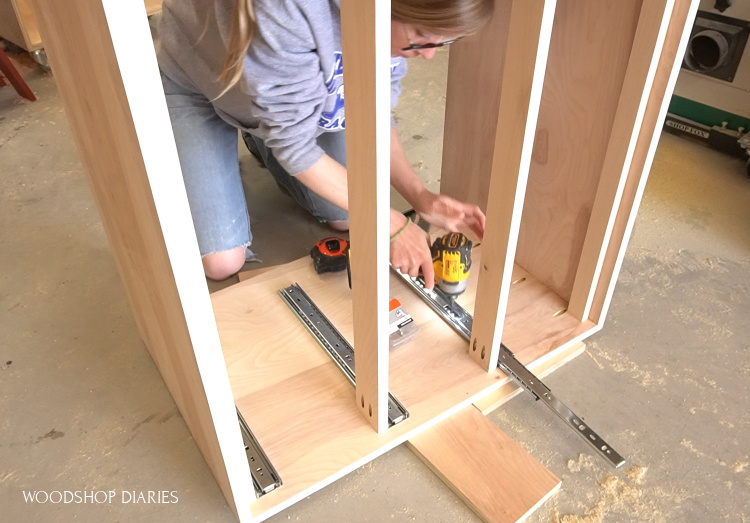
Step 4: Install Drawer Slides
I used 6 pair of 16″ ball bearing drawer slides for this DIY modern dresser build.

I've got a detailed guide here about installing drawer slides, but I but installed these 1" inset from the front edge of the dresser directly above each divider piece.
.
I made sure each slide was foursquare and direct earlier driving the screws.
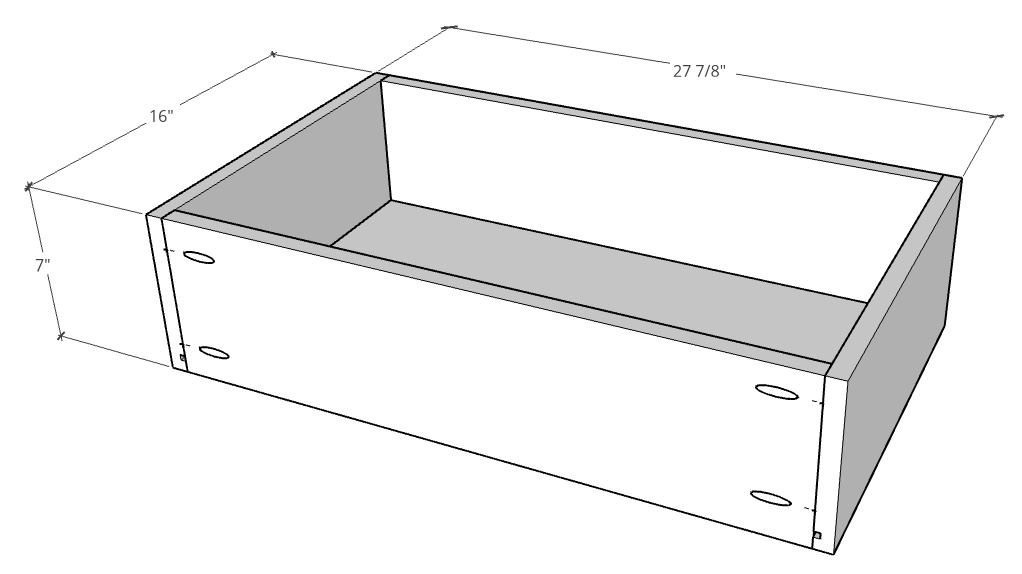
Step 5: Build Modern Dresser Drawer Boxes
I ripped some vii″ wide strips off a ¾" plywood canvas to cut down for the drawer boxes. And so I cutting all my drawer box pieces to length from these strips on the miter saw to make six identical drawer boxes like this.
.
I besides cutting the ¼″ plywood bottom panels to size besides.
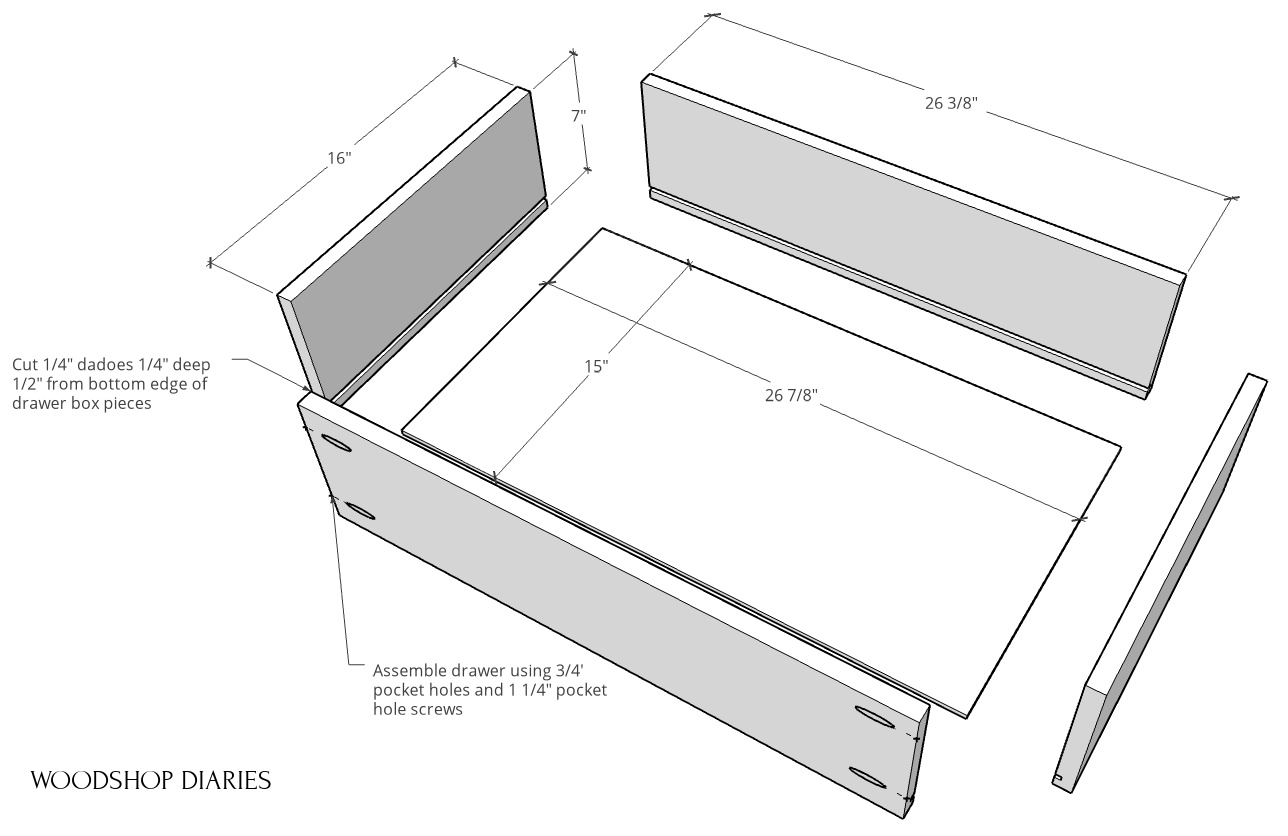
The bottom plywood panel sits inside dadoes cut on the drawer box sides, so after the pieces were cut, I began cutting these dadoes. I set my tabular array saw blade top and rip fence up and began cutting the ¼" dadoes. (You can also use a router for this instead.)
.
I become asked pretty ofttimes if you have to have a dado blade on the table saw for this. And, no, definitely not.
.
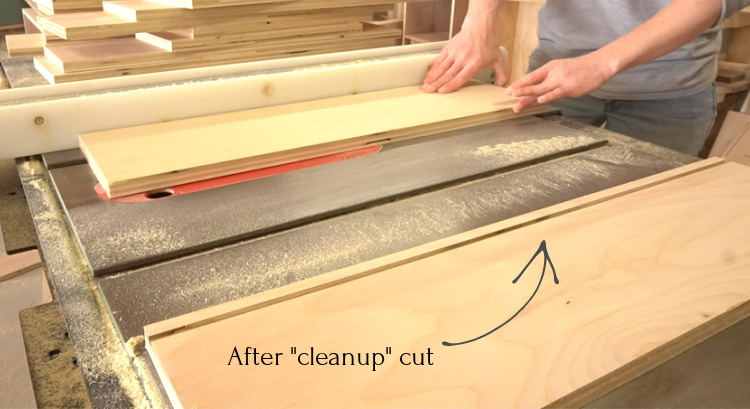
I accommodate my rip fence and cut a blade width, and so accommodate the rip fence once more to cut another blade width so that the distance between the outside cuts are ¼".
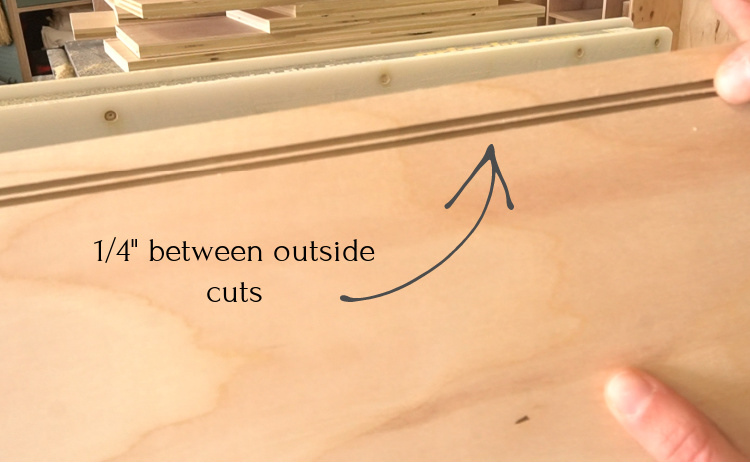
Then, I adjust again and clean upward the eye to give me a ¼" dado. It's a little extra piece of work, merely so is swapping out a blade for just a few quick cuts. Whatever works…works 🙂
After all my dadoes were cut, I edge banded the tops of the drawer pieces, drilled pocket holes and assembled the drawer boxes with one ¼″ pocket hole screws like shown hither.
Step 6: Install Modernistic Dresser Drawers
One time all half-dozen drawers were assembled, I installed them into the dresser body.

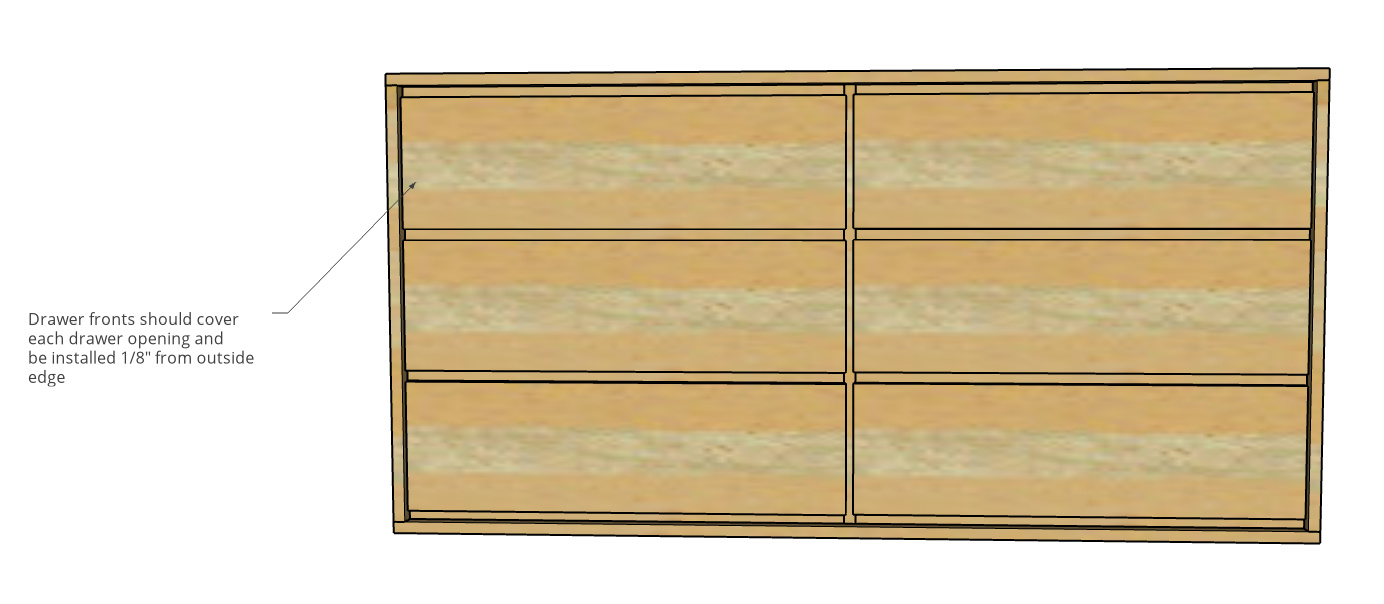
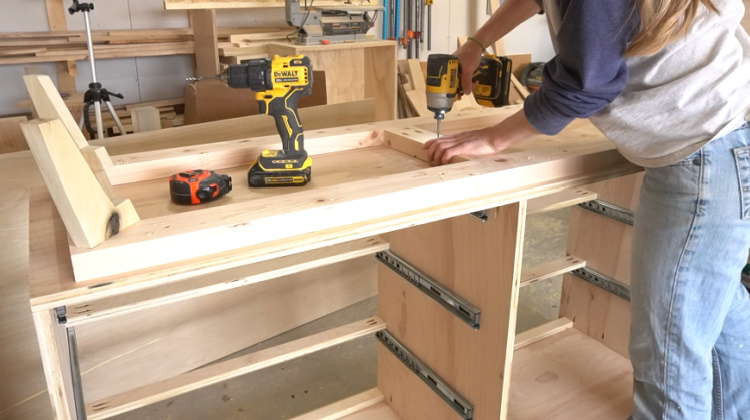
Step 7: Add Drawer Fronts
I installed these drawer fronts using 1 ¼" wood screws from the inside of the drawer boxes so that they covered the drawer box openings and were ⅛" from the dresser sides.
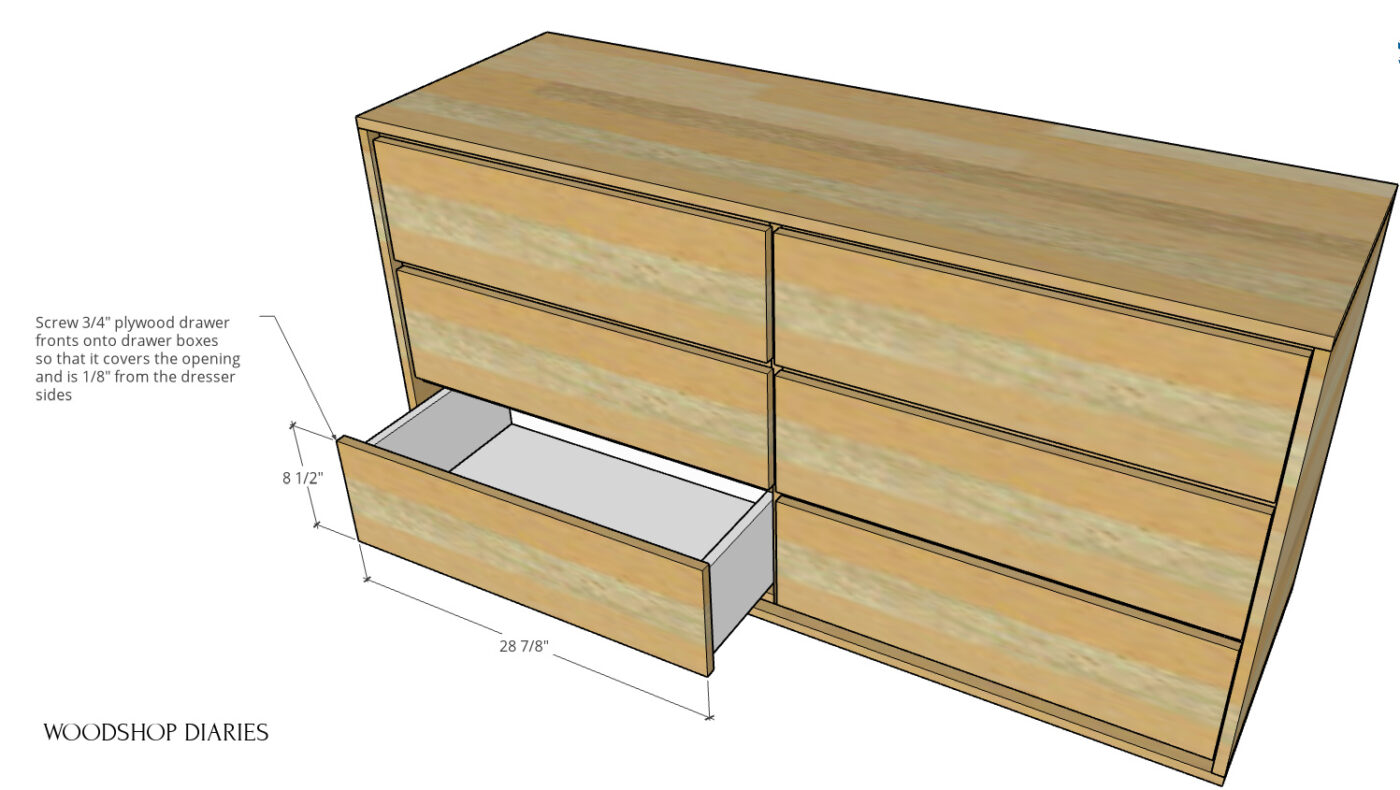
The design chosen for leaving nigh of these divider pieces exposed and allowing more than infinite than usual betwixt the drawer fronts. There is zippo scientific or technical here—it's purely merely for looks.
.
So if you wanted to make your drawer fronts larger to hibernate the dividers, you definitely can.
Now the dresser body is consummate and all that's left is the base.
Step 8: Assemble Modern Dresser Base Frame
I congenital the base frame using 2x4s. This is totally optional, only I ran the 2x4s through the planer and trimmed the rounded edges off the 2x4s just to make clean them up a little.
RELATED: Check out this post about how to remove rounded lath edges.
.
Then, I cut the base frame pieces to length and drilled pocket holes into the ends of the brusk pieces to assemble a 2×4 frame that will assistance support the weight of the dresser in the middle.
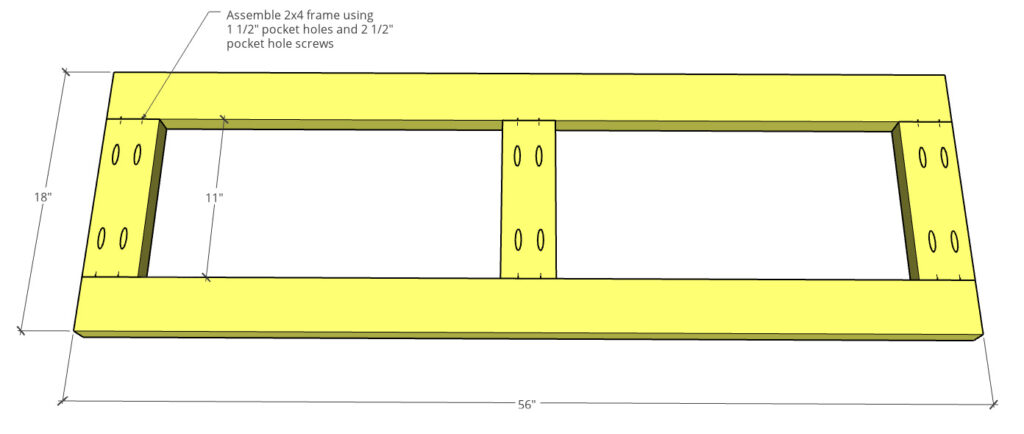
I assembled this super basic frame using pocket hole screws making sure to go the slice in the middle centered.
Step ix: Cut Dresser Legs
For the legs, I used some scrap poplar I had in the shop. But, you lot could also use standard 1x lumber or ¾" plywood for the legs if you wanted.
.
I used this aforementioned leg pattern in a few projects in the past, then if they look familiar, you may recognize them from the domestic dog bed, canis familiaris basin stand, and upholstered storage bench I built previously.
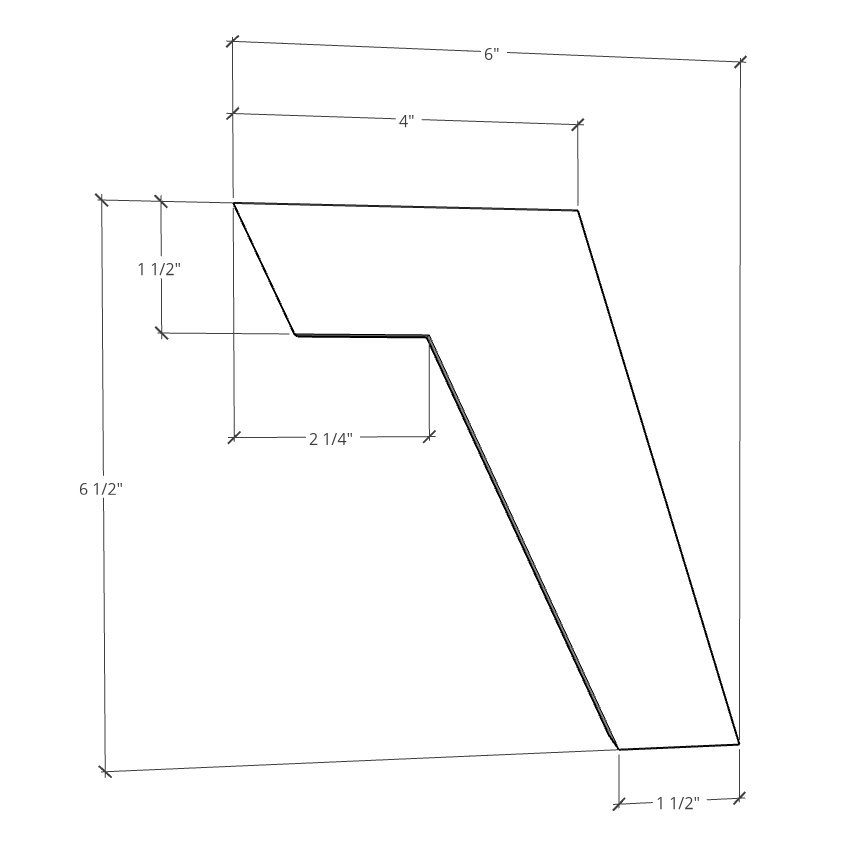
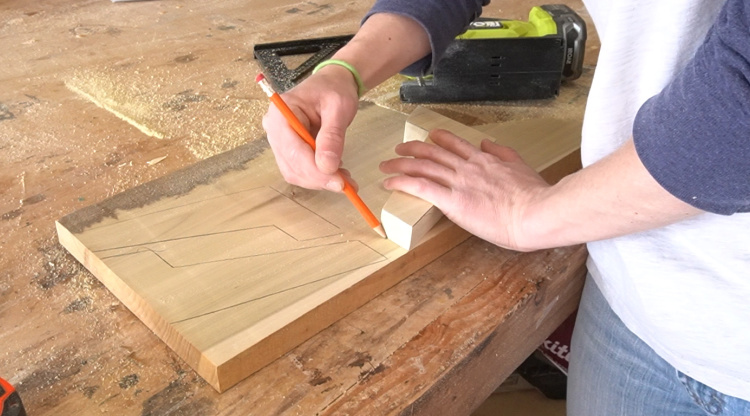
I really pulled upwards the diagram from those plans to copy for this build and traced out the design onto my poplar piece.
.
One time I had the first leg cut out with a jig saw, I sanded it and used it equally a template to trace out 3 more from the same board.
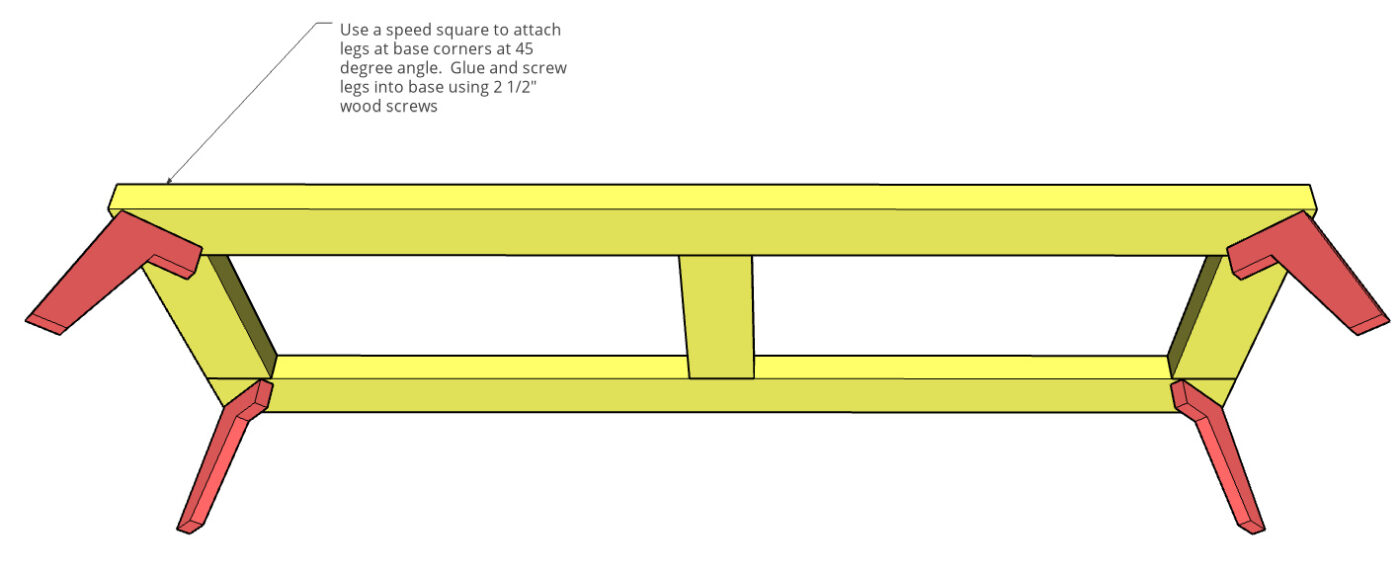
Step ten: Install Modernistic Dresser Legs
Later they were all sanded, I brought the base of operations back out and used some forest gum, a speed foursquare and a couple ii ½" forest screws per leg to attach them at each corner at a 45 degree angle.
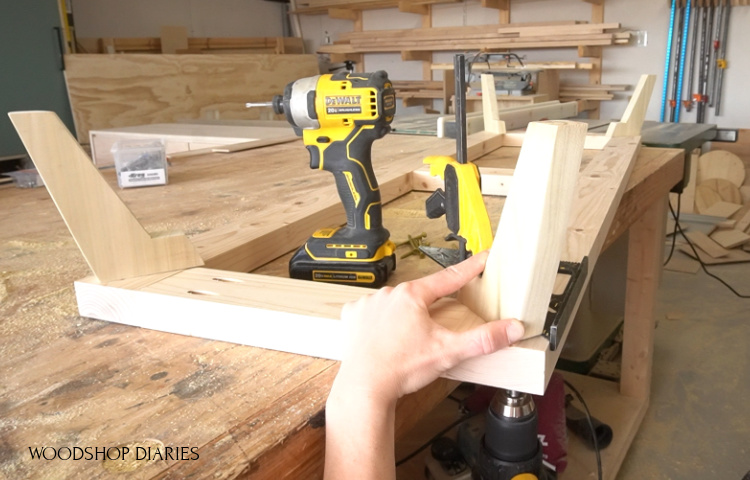
One time the base was together, all that was left was to attach it to the dresser.
Step 11: Adhere Base to Main Dresser Body
Since the dresser was really heavy with all the drawers installed, I removed them, flipped it upside down and centered the base on the bottom.
I used several 2" wood screws to attach the base to the bottom plywood panel, then flipped information technology back over.

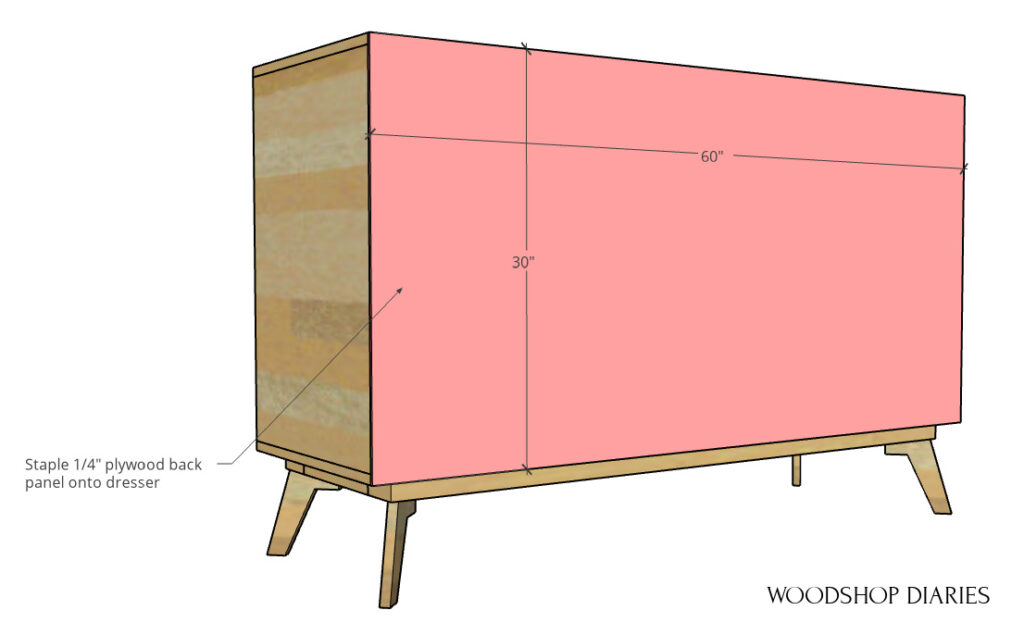
Pace 12: Attach Back Console
And finally, I stapled the ¼" plywood backer onto the back of the dresser and reinstalled the drawers.
And now she's ready for stain or pigment or whatever y'all would want to end it with. Honestly, I'm kind of digging the unfinished wait, simply I know that'southward probably non the popular opinion haha.
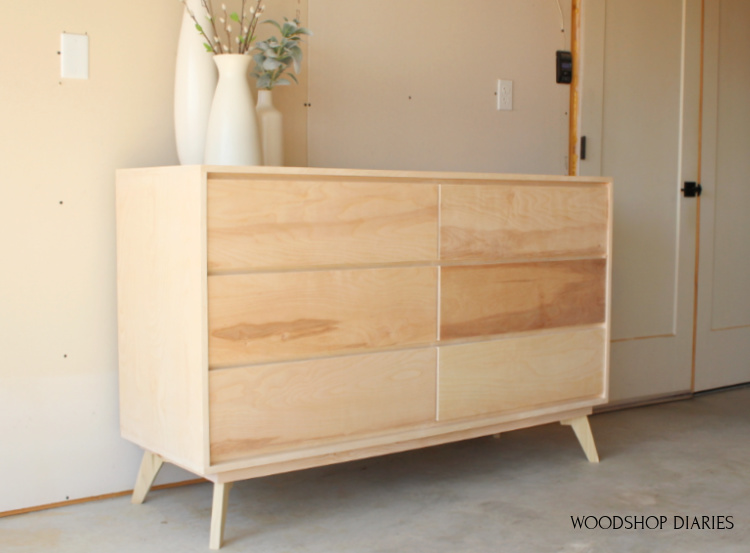
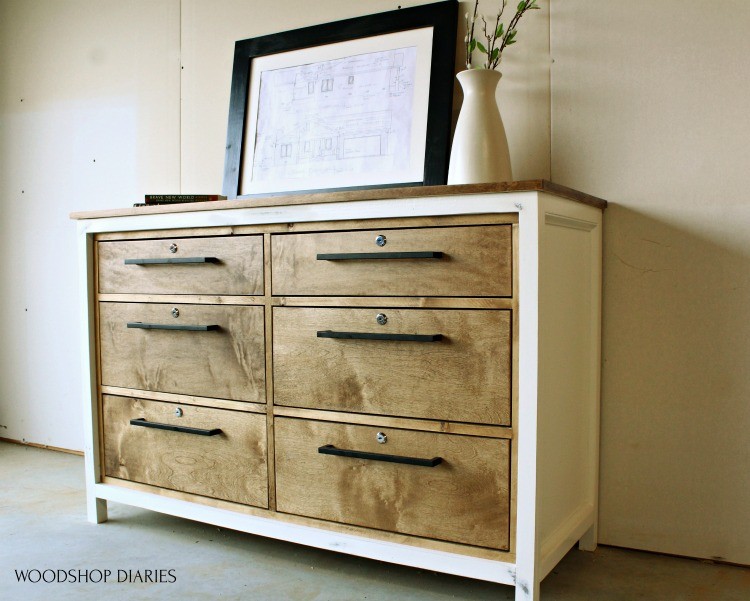
Yous can add handles or knobs to this or exit them off for a more minimalist await. But if y'all wanted to practice without hardware, yous could use the drawer slides that you can push button to open for this instead.
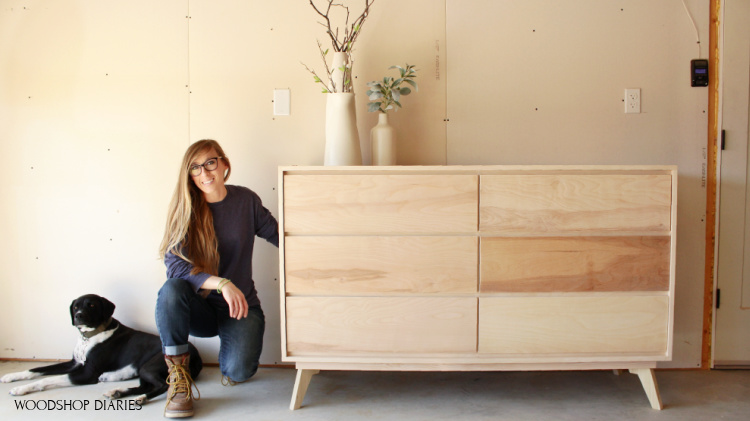
Either style, it's a classic dresser pattern I actually hope you enjoyed watching it come up together as much every bit I enjoyed building it! If you're interested in building your own, be sure to check out the printable plans hither.
.
If you enjoyed this how to build a Modern Dresser Project and want to save it for afterwards, don't forget to pivot information technology!
And don't forget to follow along and subscribe beneath and so you don't miss out on what's coming adjacent!
Until next time, friends, happy building 🙂
Source: https://www.woodshopdiaries.com/how-to-build-a-modern-dresser/
Belum ada Komentar untuk "Plans for Mid Centery Six Drawer Dresser"
Posting Komentar